August 1, 2017
One of the most frequently asked questions I receive as a photographer is other photographers or new Lightroom users wondering how to properly size their images for print, web or how to professionally and easily deliver clients to photos online! So I’m answering all of that here for you!

Sizing
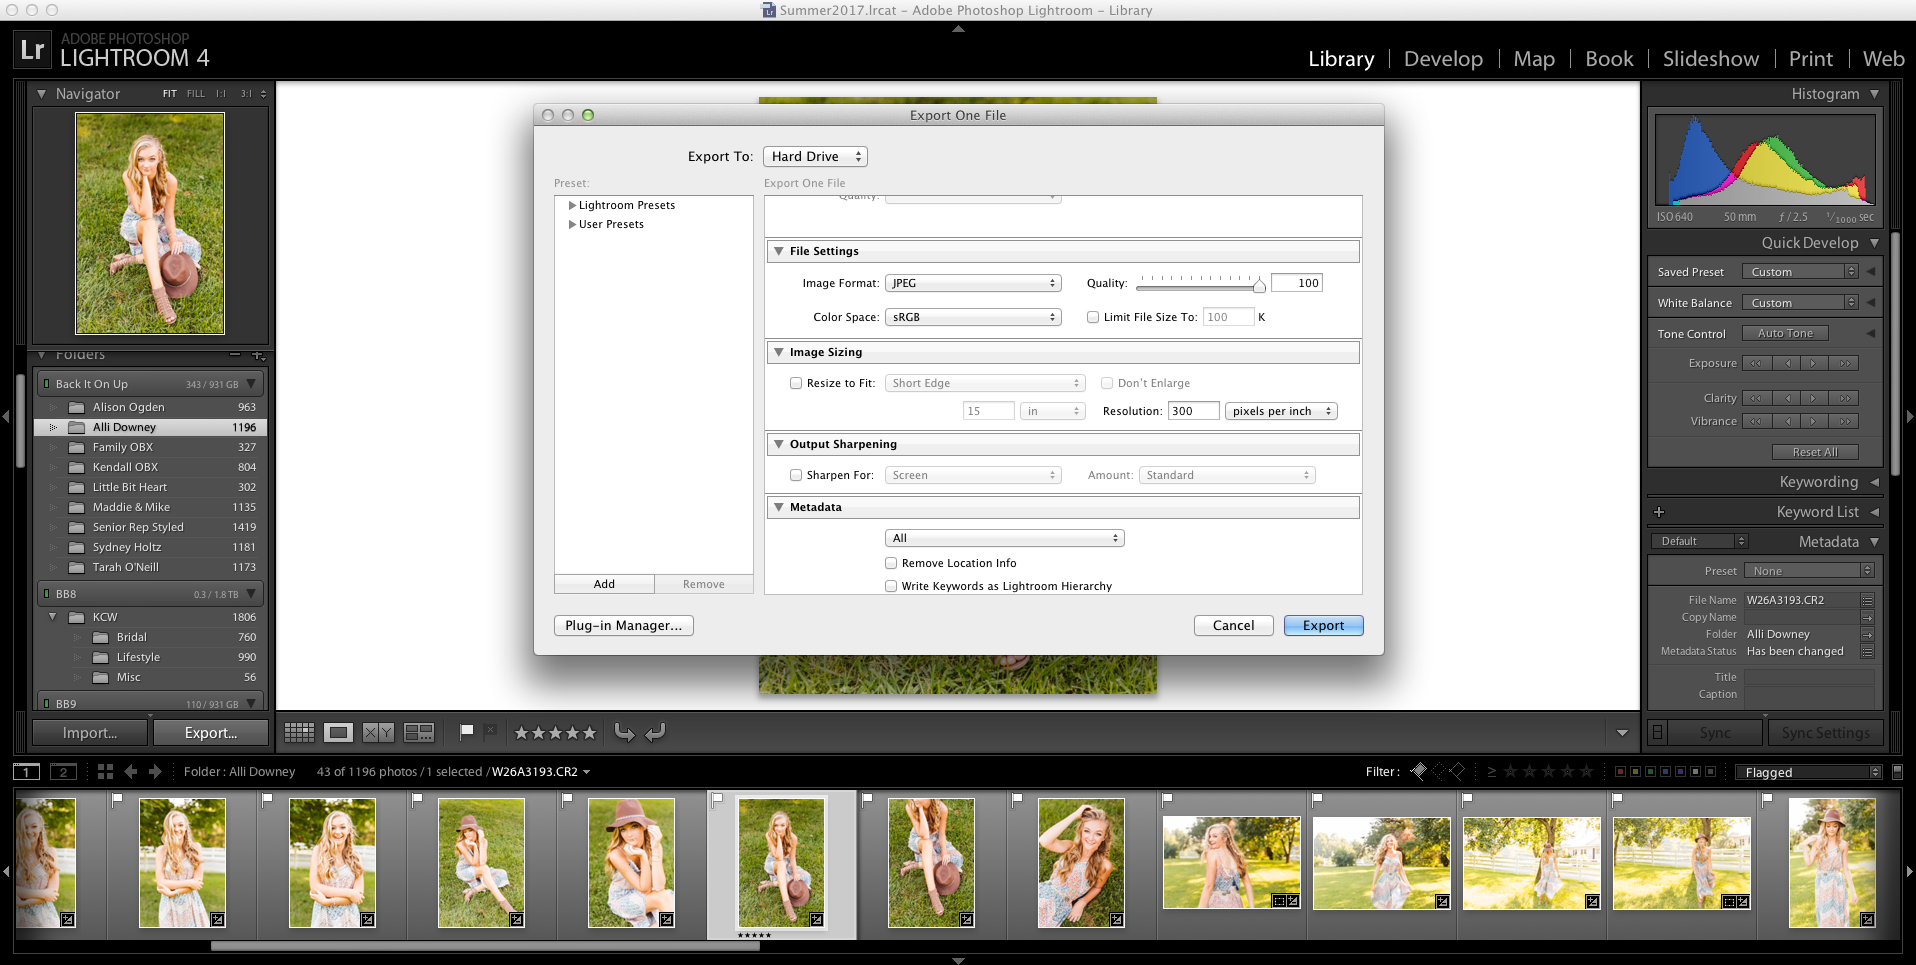
Let me start by saying, I shoot all my images in RAW format. Meaning that to properly deliver to clients I have to export them in JPEG form. When I first started photography sizing was super confusing to me. What the heck is pixels per inch and what does that mean? Simply put it is the number of tiny little pixels that are within every inch. Simple right? At least for me, I am sticking with that to keep myself from any further confusion.
To start… In Lightroom when I am viewing the export menu I double check to always make sure the image format is JPEG and the quality is at 100 (because there is no reason to lessen the quality of your beautiful images, right)! All of that is also pictured below to show you a visual! Along with those two things you will also notice that I have “300” written into Resolution box and “pixels per inch” selected from the drop down. Simply put those are my settings for every print product I create or any time I deliver a client gallery. This is what you would consider to be a high resolution image! Which is best for images that can be blown up huge or printed crisply and without pixelation!
I use to have a cheat sheet I made myself… 300 ppi for print and client delivery and 72 ppi for web! That was until Blogstomp came along and I realized that I could turn my print images into perfectly web size stomped images! So now there is no need to export galleries twice… but that can be saved for another future blog post!

Delivery
Now onto client delivery! So as you probably know, I am a high school senior and wedding photographer. For my senior and portrait clients I solely use online galleries to deliver clients images to them! For wedding clients I use both online galleries and custom USB’s! This way they not only have a way to easily share with family and friends, but also a place where their photos are backed up! The best of both worlds essentially, especially since online galleries allow me to show clients sneak peeks almost immediately and offer them their full gallery as soon as I am done editing without the wait of snail mail!
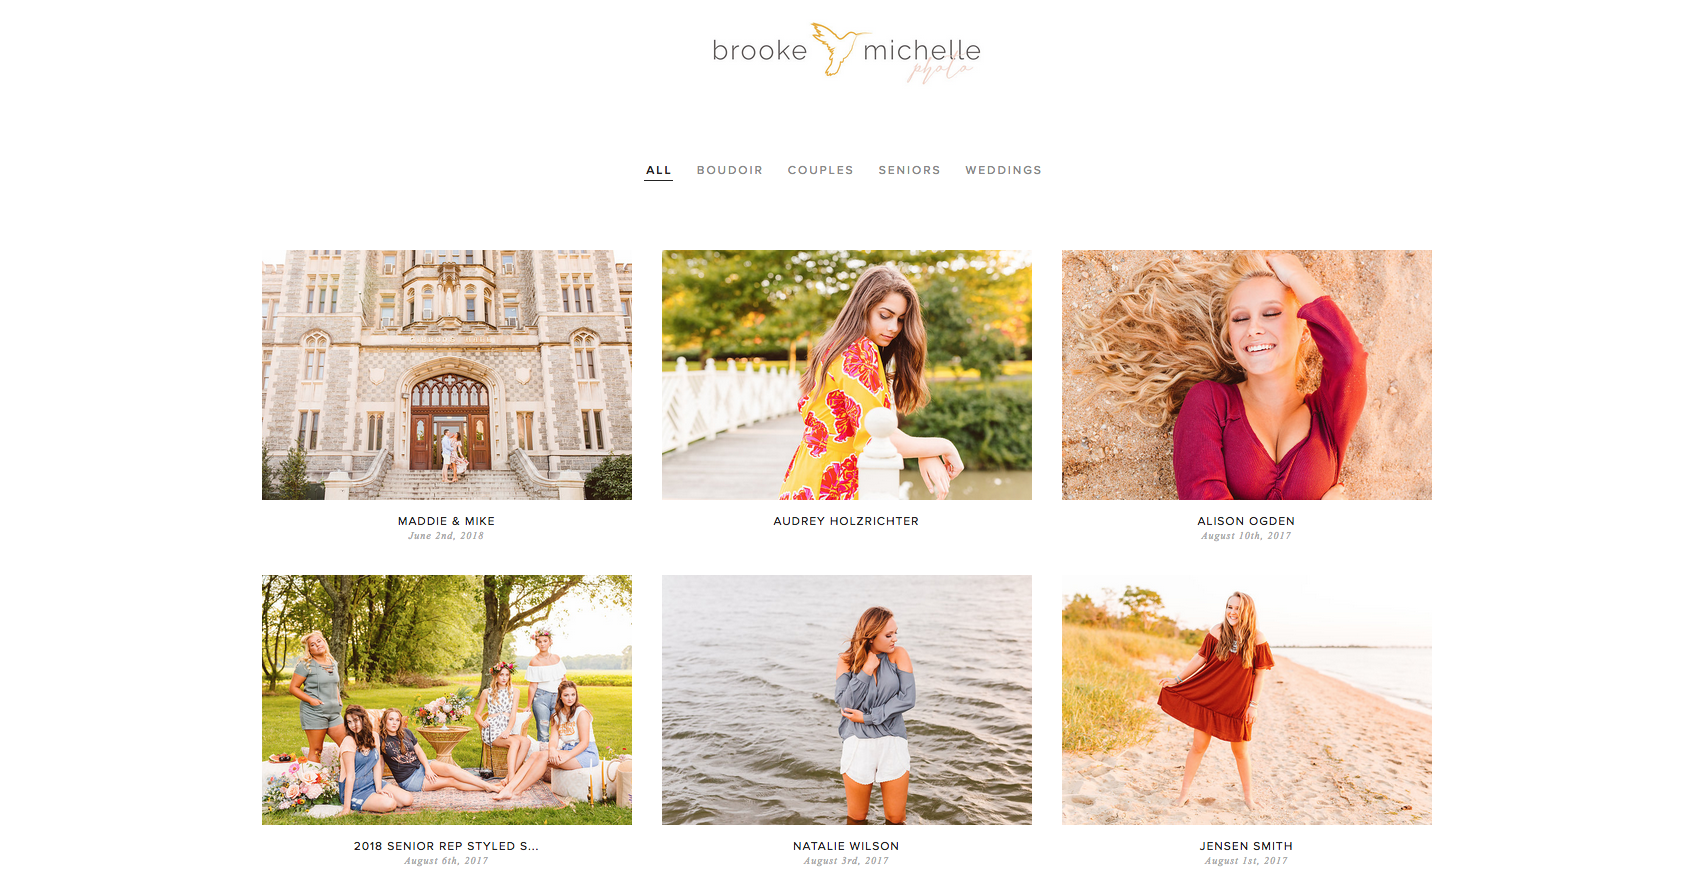
For my online galleries I use Pixieset galleries (as pictured above)! This gallery and website was great when I was a brand new photographer and has continued to grow and evolve right alongside my business! The best part is that these galleries can be used by new photographers or photographers who are shooting 50 weddings a year! Pixieset offers a range of options including a free option for those just starting out where you can upload galleries, deliver them to your clients and then delete and upload a new one a week later! The only downside is you can’t have as many as I have pictured above since you can only store 3gb worth of images with the free version. But the best part? They have plenty of affordable payment plan options and the galleries look insanely gorgeous when they arrive in a clients inbox!
Sign up and try Pixieset for free using my referral code HERE!
Have more questions? Leave them in the comment section below and I’ll be happy to answer them for you!
***This blog post contains affiliate links***
Other posts you’ll fall in love with:
Tips for Creating a Consistent Editing Style
My Favorite Free Online Resources for Photographers

Be the first to comment